Taking 360° Images
Table Of Contents
Introduction
I got the idea into my head that I would like to take 360° images of razors. You would be able to look at the razor at any angle you fancy and zoom in to fine details. Something a book or a website with just images could never do. Something like this:
Play around with this 360° image. Try the following:
- Drag the mouse while holding the left button to rotate.
- You can also use the scroll-wheel to rotate the image.
- Click on image to zoom in to that spot.
- Drag the mouse while holding the left button to move around in the zoomed image.
- Drag the mouse while holding the middle button to rotate in zoom mode (or use the scroll-wheel).
- Click on the image to zoom out again.
- Click on the top left icon to enter/leave full-screen mode.
More 360° images can be found on this test page.
Taking images like the one above is not too difficult if you have all the hardware and software required. The software was the first stumbling block. Most software that can do this is quite expensive. It's aimed at professional product photographers. I decided to write my own if at all possible. Of course it is possible, as the above image shows.
This article is a fairly detailed description of my personal set-up and workflow for taking 360° images. Maybe it can help you to do the same. I'm not a professional photographer. This is my amateur set-up and workflow. Let's have a look at what is required to take 360° images.
The turntable
The main device needed for taking 360° images (apart from the obvious camera) is a turntable. Not one to play old fashioned vinyl records, but a photographer's turntable. You place the object (e.g. razor) onto the turntable and rotate the turntable a little bit between taking images, while the camera remains stationary.
Modern turntables can be controlled by a computer and I opted for one that can be controlled via WiFi and comes with instructions how your own software can talk to the turntable.
After a bit of research I settled on the memorably named MT200RUWSL20 by a Chinese company called ComXim. I opted for a relatively small 20cm model. With hindsight I would now buy a 30cm model despite the higher price. A turntable like this will set you back about £120/€135/$150 (as of 2020) plus shipping and — if you're unlucky — import duties. I ordered mine from AliExpress. This is what you get:

There are some additional items I find useful when using the turntable:
Optional — An additional WiFi adapter
To use the turntable, your computer's WiFi needs to connect to it. That means that if you usually connect to the internet using WiFi you will lose your internet connection while controlling the turntable. I solved that problem by getting an additional USB WiFi adapter, so my laptop can have one WiFi connection to the internet and one to the turntable at the same time.
As a Linux user I bought a very cheap adapter based on a Ralink 5370 chipset. The cost is less than a tenner.

Optional — USB 5V🠞12V Step Up Voltage Transformer
The turntable comes with its own 12V power supply, but I want to be able to run the whole set-up from USB power banks. Those deliver 5V not the 12V the turntable requires. I therefore purchased a “USB step up voltage transformer”. That's a fancy way of saying “USB charging cable”. A link to the one I bought is here.

Light tent
Bright and even lighting is very important for 360° photography. A light tent is the best solution for this. I opted for one with built-in LED light strips. Something like this:

Make sure the light tent is big enough to fit your turntable. If you choose a light tent without built-in lights you need to get some additional bright lights to illuminate the objects.
Camera
Any camera that can be controlled via a USB cable from a computer is suitable. This is called “tethered shooting”. The software I wrote uses a program called “gPhoto2” to talk to the camera. A list of all cameras supported by gPhoto2 can be found here. Any camera that has “Image Capture” listed under “Additional Abilities” is suitable. Ideally you want a camera that has “Liveview” listed as well.
I was rather surprised that my 12 year old Canon EOS 450D has all the capabilities required for tethered shooting. More modern cameras have a higher resolution , but I find the images the Canon EOS 450D takes more than adequate. I'm using the 18-55mm kit lens that came with the camera.

Camera USB cable
To tether the camera to a computer you'll need a USB cable. The type of cable depends on the camera. Make sure it's long enough. No picture — it's a USB cable.
Tripod
A tripod is essential when taking 360° images. You don't need anything stormproof, but it should be height-adjustable and keep your camera steady. I prefer to have a quick release adapter fitted to the tripod, but that is optional.

Optional — a ring light
I wanted more light when taking images, so I purchased an LED ring flash. This model has a mode that illuminates constantly. An LED ring light, rather than a ring flash. The light from the light tent comes from above, the light from this ring light from the front. I found that to be a good combination.

Spare batteries
Easy to overlook, but nothing is more annoying than running out mid-shoot. Make sure you have plenty of rechargeable batteries for your camera and lights. Depending on your set-up you need some power banks to run the turntable and lights.

A computer
No surprise here. Any laptop running MacOS or Linux should do. Faster is better. More memory is better. There is some heavy image processing involved. More CPU cores is definitely better. Windows is not supported. I'm sure there is 360° software for Windows, but not this one.
That's all we need to take 360° images. Here's a picture of the complete set-up:

Software
For now the instructions are for Linux only. Specifically for Ubuntu. MacOS instructions will follow. (Until then try using “brew” instead of “apt”)
Before we install the software to take 360° images, we first need to install some programs that are required by that software. This is where it gets involved and complicated. I did say that these instructions are very detailed. Skip the software installation stuff if you're not interested (yet).
gPhoto2
This is the software that communicates with the camera.
sudo apt install libgphoto2-dev
sudo apt install gphoto2
Once installed, we check if gPhoto2 can detect our camera. Turn the camera on, connect it with the USB cable to the computer and type:
gphoto2 --auto-detect
If all goes well, you'll see your camera listed. Like this:
Model                          Port
----------------------------------------------------------
Canon EOS 450D (PTP mode)      usb:001,006
ImageMagick
I use ImageMagick to perform the image processing (cropping, white balance etc.). You can try the following to install ImageMagick:
sudo apt install imagemagick
Once installed run the following command:
identify --version
If the output shows that version 7 is installed like this…
Version: ImageMagick 7.0.10-10 Q16 x86_64 2020-04-29
…all is well. If however the output looks like this…
Version: ImageMagick 6.9.10-23 Q16 x86_64 20190101
…then version 6 is installed and unfortunately version 6 is missing some features I'm using. We need to build version 7 of ImageMagick ourselves.
Building ImageMagick Version 7
First we make the source repositories available:
sudo vi /etc/apt/sources.list
The 'deb-src' entries are probably all commented out. Remove the comment for those that a 'deb' entry above them that is not commented out. Save the file.
sudo apt-get update
Get the ImageMagick build dependencies:
sudo apt-get build-dep imagemagick -y
Have a coffee break then get the ImageMagick source:
wget https://imagemagick.org/download/ImageMagick.tar.gz
tar xvzf ImageMagick.tar.gz
cd ImageMagick-7*
./configure
make
sudo make install
sudo ldconfig /usr/local/lib
Log out and back in again.
identify -version
Version: ImageMagick 7.0.10-10 Q16 x86_64 2020-04-29
Building ImageMagick 7 with fftw on macOS
The ImageMagick version installed by “brew” on MacOS is version 7, but it is missing an important feature—fftw. Here's how to build ImageMagick with fftw on macOS:
brew edit imagemagick
Where there are lots of “depends_on” entries, add the following line:
depends_on "fftw"
Elsewhere in the file, change --without-fftw to --with-fftw, save the file and run:
brew install --verbose --debug -s imagemagick
The output should contain:
==> ./configure --disable-osx-universal-binary --prefix=/usr/local/Cellar/imagemagick/7.0.9-21 --disable-dependency-tracking --disable-silent-rules --disable-opencl --enable-shared --enable-static --with-freetype=yes --with-modules --with-openjp2 --with-openexr --with-webp=yes --with-heic=yes --without-gslib --with-gs-font-dir=/usr/local/share/ghostscript/fonts --with-fftw --without-pango --without-x --without-wmf --enable-openmp ac_cv_prog_c_openmp=-Xpreprocessor -fopenmp ac_cv_prog_cxx_openmp=-Xpreprocessor -fopenmp LDFLAGS=-lomp
node.js
My software needs a runtime environment called “node.js”. It can be downloaded from here, or follow the installation instructions from this page.. For Ubuntu the commands required are:
curl -sL https://deb.nodesource.com/setup_14.x | sudo -E bash -
sudo apt-get install -y nodejs
git
The “git” software needs to be installed to get the “view360” software.
sudo apt install git
Install the view360 software
Get the software from github:
git clone https://github.com/riverrun-git/view360
Download module dependencies:
cd view360
npm install
Run the view360 software
To run the software, issue the following command while in the view360 directory:
node index.js
Now we can open the view360 web page at http://localhost:4321/360/
To stop the view360 software, just press Ctrl-C
Create some directories
The following will be configurable in future, but for now the following directories need to exist or be created in your home directory:
mkdir ~/Pictures
mkdir ~/Pictures/Capture
mkdir ~/Turntable
mkdir ~/tmp
For now there should also exist a “project directory” for every object we want to photograph:
mkdir ~/Turntable/SampleProject
Workflow — how I take 360° images
Connect camera and turntable
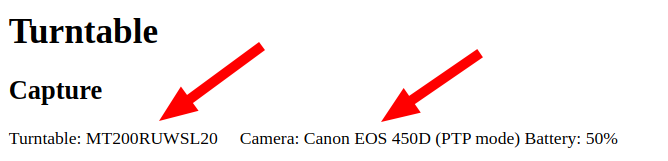
Before starting the software, please make sure that both the camera and turntable are switched on and connected to the computer. The view360 web page should show both devices:
Camera settings
To get consistent results for all images, we need to shoot in full manual mode. For my camera/lights/turntable/tent combination the following camera settings (for a Canon EOS 450D) are a good starting point:
- Turn off the image stabiliser on the lens
- Set the shooting mode to “M”
- Set the ISO to 100
- Set the aperture to f/29 - I want depth of field. Plenty of it.
- Set the shutter speed to 0.5 seconds
- Set the white balance to anything but “Auto” “Shadow” works for me
- Leave auto-focus enabled. The auto focus mode should be “One-Shot AF”
- Choose automatic AF point selection.
Take the pictures
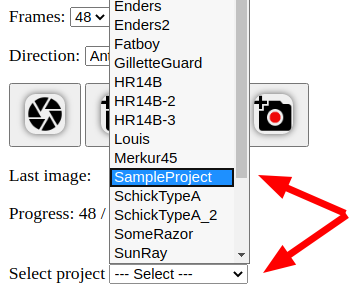
To take the images, we select the number of frames (e.g. 48) and the turntable direction (“Anticlockwise” if in doubt), then click on the rightmost camera icon

If everything went to plan you'll be able to watch how 48 images are taken.
Select project
Once all the images have been taking, select the project you created earlier (by creating the “Turntable/SampleProject” directory).
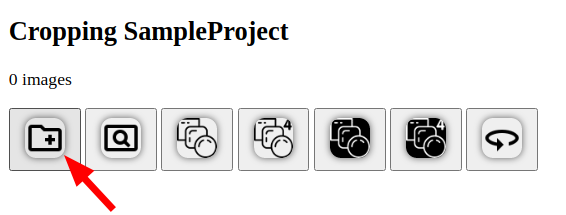
Copy images to project
Now we copy the images we have taken to the project directory for further processing. Click on the leftmost icon and confirm:
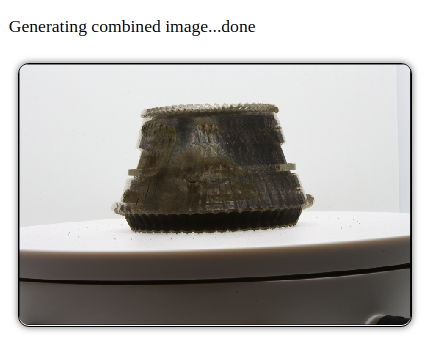
Generate combined image
Before we can crop the images, we generate a combined image that shows the darkest pixels across all images captured. This will allow us to accurately crop the images.
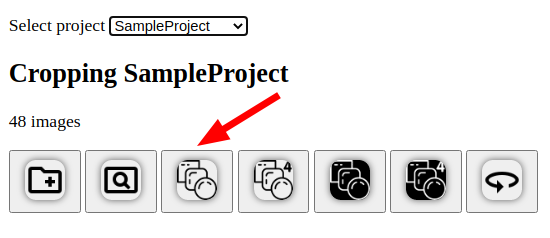
The other similar icons combine just four images or invert the images before finding the darkest pixels.
The result will look something like this:
To crop the images, we draw a rectangle an top of the combined image. You can move the corners and edges of this rectangle in the usual way. Then we click on the crop-button:
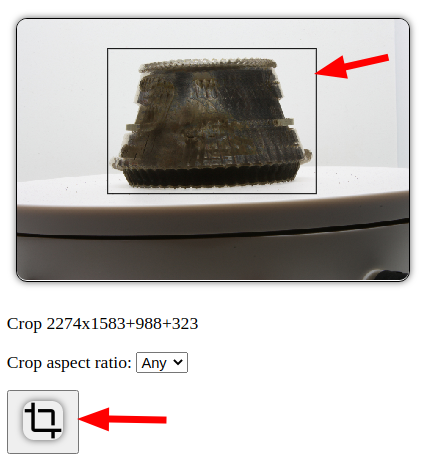
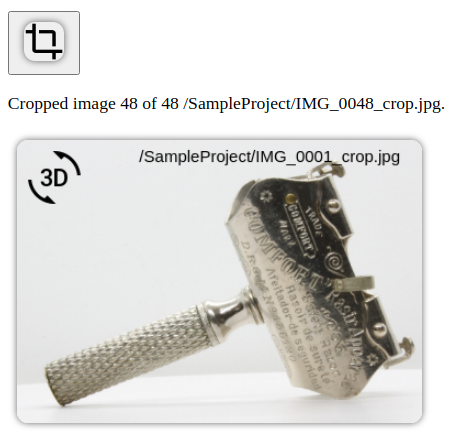
You will be presented with a 360° image of the cropped, but not yet whitebalanced images. You can change the cropping region if your not happy with the result so far:
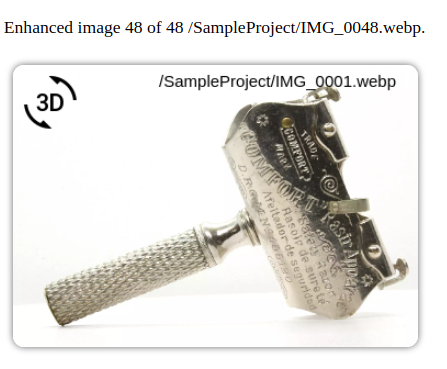
Enhance images
We are now presented with this image, which allows us to adjust the white balance of the images, sharpen the images and adjust their contrast:
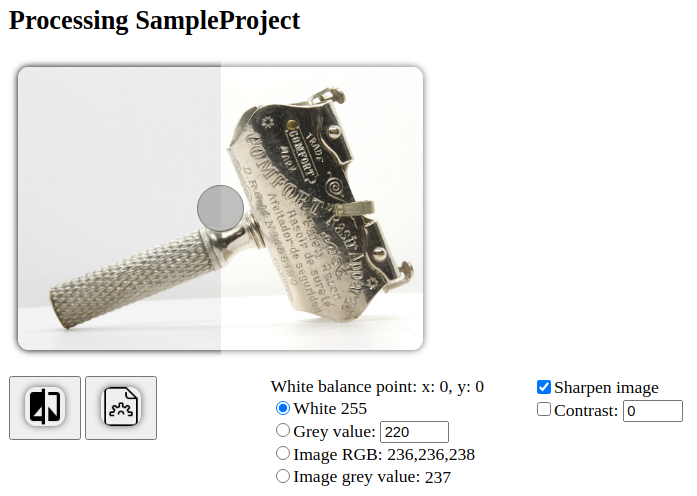
There are quite a few options here:
- Click on a point in the image to choose it as the white balance point
- Choose which white/grey value will be used at that pixel across all images
- Choose to sharpen the images or not
- Choose to enhance the image contrast (experimental)
To see what effect the selected enhancements have, click the left of the two buttons. The circle at the centre of the image can be dragged left or right to see the effect the settings have on the image.
Finally, click the right of the two buttons and the enhancements will be applied to all images. When the image processing has finished, you will be presented with the final 360° image:
And that's how the 360° image at the top of this page was made.